Despite it’s name, the robots.txt file is a relatively easy to create and edit. It’s primarily a document used to work with search engines, but it can also be utilised to improve your SEO efforts and if you’re looking for a way of improving your SEO that isn’t overly complicated or time-consuming, then this is one of them.
What is a robots.txt file?
A robots.txt file (also known as the robots exclusion protocol) is a text file that is housed on almost all websites across the internet. It’s a plain text file that lets search engine robots know what they can and cannot use in SERPs from your website. When a search engine crawls your website, it is assumed that it can search through all your pages in order to source and deliver search results, but there may be pages or files that you do not want a certain robot (or user agent) to crawl.
By creating a robot text file, you are essentially creating a set of rules. When a search engine is about to visit your website, before it visits the target page, it will first check the robots.txt file for instructions.
What happens if I don’t have a robots.txt file?
As mentioned, it isn’t necessary to have a robots.txt file, so if you choose not to include one then search engine crawlers will just assume that they can go ahead and crawl all of your website’s pages.
Viewing your robots.txt file
If you’d like to quickly view your website’s robots.txt file, there’s an easy way of doing so. In fact, you can view any website’s robots.txt file by using this method.
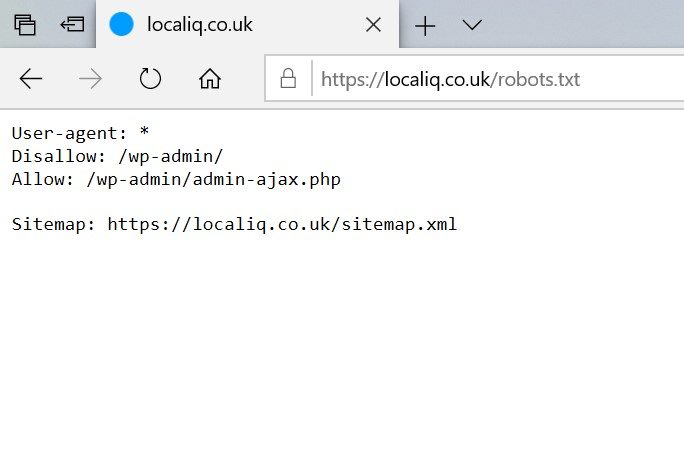
Go to the URL bar in your preferred internet browser, and type in website.com (changing this to your chosen website URL) then simply add /robots.txt after it. For instance, if we wanted to view ours here at LOCALiQ, we’d simply type in www.localiq.co.uk/robots.txt and we’d be able to view the file.
When you carry out this action you will hopefully find a robots.txt file that looks a little something like this:
However, this doesn’t always happen, and you may find yourself faced with one of two alternative situations:
1) The file will be completely empty
This means that whilst a robots.txt file has been put in place for that website, it hasn’t been (or doesn’t need to be) populated.
2) The website will show a 404 error for the robots.txt file
A 404 is an error message that websites will display if the server can’t find the requested resource (in this case that’s the robots.txt file). 404 errors are something that webmasters will want to fix with some urgency as too many can negatively affect SEO.
If you’ve searched for your own website’s robots.txt file and there’s a file in place, it will probably display just a couple of lines of default text, which may be perfectly fine for your personal needs or you may wish to edit that file. Alternatively, if there’s an empty file or it’s showing as a 404 error, you’ll probably want to create a robots.txt file to rectify that.
How to locate and edit your robots.txt file
Whether your website already has a robots.txt file or you need to create one, you’ll need to work out where exactly your robots.txt file is housed. This is probably the most “technical” part of this entire exercise.
With most standard websites, you’ll need to log in to your hosting account and locate the file management section of your site.
In the root directory of your website you should be able to open the file and be able to edit it. If you plan on re-writing your robots.txt file it’s a good idea to remove any existing text within the file. Once you’ve done this, see the “creating a robots.txt” section of this article for more information.
What if I don’t already have a robots.txt file on my website?
If you don’t currently have a robots.txt file you will need to create one. Don’t worry, this is a simple process and you can do this with any plain text editor (notepad or TextEdit for instance), but the text editor needs to be able to create standard UTF-8 text files.
Make sure you avoid using a word processor such as as Microsoft Word or Apple’s Pages app as the natural formatting of word-processed documents can often create problems for crawlers by creating and including additional code. This could cause the robots.txt file to be unreadable for search engines, meaning they will ignore the file.
Follow the steps below to add basic instructions to your text file, and remember to ensure you save the finished text file as robots.txt
Robots.txt files in WordPress
If you’re using WordPress, you won’t be able to find the robots.txt in your files. This is because WordPress creates a virtual file if there is no robots.txt in the root directory. You may want to consider using Yoast to set up a robots.txt file for your WordPress website.
Creating your robots.txt file
So you’ve followed the steps above and should now find yourself staring at a blank text file. Great, you’re ready to start adding some instructions for search engines.
Each robots.txt file is made up of one or more ‘groups,’ and each of these groups contain instructions, these are kept to one directive per line.
The following information is specified within each group;
- Which robot/user agent that particular group applies to
- Which pages and files on a website the search engine should crawl and which it shouldn’t
What do I need to include in my robots.txt file?
Let’s get started by typing the following two lines into our file.
User-agent: *
Disallow:
The user-agent field is where you specify what user-agent that rule applies to. Different search engines use different user-agents to crawl and index pages. For instance Googlebot is the user-agent for Google Search and Googlebot-image is the user-agent for Google Image Search).
If you’d like to create a rule for all robots, use an asterisk (*), as shown in the example above.
The disallow field is where you would specify which page or file should not be accessed by the particular user-agent you’ve highlighted. As you can see, the “disallow:” line in the example above has no additional text, so this rule tells all web crawlers that they are free to access any directory or file on your website.
Congratulations, those two lines above are what a basic robots.txt file looks like. And if you’re confident that all of your website’s pages are suitable for crawling you can go ahead and save and upload that file.
However, you may wish to stop search engines from crawling certain pages on your website, especially if SEO is a key goal. To do this, you’ll need to include some additional rules in the robots.txt file.
Why would I want to stop search engines from crawling my pages?
It sounds counter-productive, right? To spend so much time on optimising your website for search engines, only to tell them they can’t access certain pages. Well, stopping them from crawling certain pages can actually have a positive effect on your SEO efforts.
For instance, you may have a log-in page that only website administrators need to access. This page has no real value to your website visitors and having a search engine crawl and then display this page in its results pages wouldn’t be beneficial to your website as you don’t want your website visitors landing on this page.
The same goes for pages like shopping carts or thank you pages, will these pages are integral to the user experience of your site, you wouldn’t necessarily want these pages to show up on the search engine results pages.
How to prevent pages from being crawled using the disallow directive
There are a few methods you can use to stop search engines from crawling pages.
If you’d like to stop robots from crawling your website completely, you can do that by keeping the same two lines of text as above, but add a forward slash after the disallow directive so it looks like this.
User-agent: *
Disallow: /
However, it is unlikely you will want to stop your entire site being crawled, so you can specify what individual pages and directories should not be crawled. This is done by adding that particular file or page URL after the disallow directive.
User-agent: *
Disallow: /example_database/
Disallow: /example_scripts/
Disallow:/Your_page_here.html/
Notice that each ‘disallow’ directive falls on a different line. This is because there needs to be a new line created for each disallow rule. To elaborate, the following line would not be understood:
Disallow: /database/, /scripts/
If you want to start adding rules for separate robots, then that can also be done by adding the basic group we started with, only you replace the asterisk with a specific crawler. For instance, if you wanted to stop the Google search user-agent and the Google image search user-agent from crawling your website, the group would look like this:
User-agent: Googlebot
Disallow: /
User-agent: Googlebot-image
Disallow: /
It may be worth familiarising yourself with the most popular user-agents and their purposes.
The allow directive
If you’ve got a particularly complex website, you may want to allow access to a sub-folder on your website even though the parent directory is disallowed. There is a directive for this, but it is only applicable to Googlebot.
For instance, you may want to disallow a gallery, but allow the “new-products” folder under that directory to be crawled. This is possible by adding this:
User-agent: Googlebot
Disallow: /gallery
Allow: /gallery/new-products
The Crawl-delay directive
You can also add a directive to your robots.txt file that forces search engine crawlers to wait a certain amount of time before crawling the next page of your website. The wait time is milliseconds, and helps if you have a website with thousands of pages and don’t want to run the risk of impeding your server with these continuous requests for pages.
It’s a directive that’s not applicable to most websites, but worth noting if you do have a large website.
It’s also worth noting that Googlebot does not adhere to the crawl-delay directive and if you wish to put this in place for Google, you will need to do so via Google Search Console’s crawl budget control.
Don’t forget to add your sitemap to your robots.txt file
It’s optional to include your sitemap on your robots.txt file. But when robots start crawling your website they look at your robots.txt file first, so this is a could place to notify them of your sitemap. You can do this by adding the following line to the bottom of your robots.txt file:
sitemap: https://www.yoursite.co.uk/sitemap.xml
(replacing yoursite.co.uk with your website’s own URL)
Important things to note about robots.txt files
robots.txt files are advisory, not hard set rules.
Whilst search engine crawlers will look for your robots.txt file, the instructions you provide within them are directives only, which means that the search engines don’t have to adhere to them.
If you have content or pages that you’d prefer not to be indexed the best way to do so is to password protect that particular page or directory.
Disallowing a page, doesn’t always stop it from being indexed.
It’s also worth noting that including a “disallow” rule for a page or directory in your robots.txt file doesn’t always stop that page from being indexed.
For instance, your page might’ve already been crawled before you put a robots.txt file in place. This means that your website has been indexed and the robots.txt file is will just tell search engine crawlers they can’t re-crawl it. Alternatively, the page you are trying to block may be linked to from another page that search engines do have permission to crawl.
If you wish to stop a page from being indexed, it is better to do this by adding page directives. These directives can be added to the <head> section of that particular page’s HTML and will look like this:
Robots.txt files are case sensitive
If you try to disallow “/Directory” this rule will not apply to “/directory” so make sure your directives match up with the naming conventions of your files.
Conclusion
Once you feel you have the directives you need in your robots.txt file, you can always test it with Google’s robots.txt testing tool. Once you’re happy, save it in your root directory, ensuring that you have removed, or over-rode the previous robots.txt file if there was one.
Hopefully your robots.txt file is now in place and working without blocking search engines from accessing important parts of your site.
Now that it’s in place, you won’t have to revisit it too frequently, but you should review it you migrate your website or are performing a technical SEO audit.