Google Business Profile (formerly known as Google My Business) is a great tool you can utilise to help improve your local SEO strategy and improve your visibility on search engines. If you are working with an external agency to implement your SEO strategy, you may need to grant them access to your Google Business Profile.
Following the instructions below will ensure a simple and secure way of ensuring the right people have access.
At LOCALiQ, we sometimes need to optimise a client’s Google Business Profile, so granting us access makes it easy for us to access your accounts without you having to share confidential passwords or logins, which can create security issues further down the line. This step-by-step guide will teach you how to grant us access to your Google My Business accounts, and how to set up new users.

How to share Google Business Profile access on desktop and mobile
1. Decide on user roles
There are two options for page roles within Google Business Profile:
Owners have complete ownership over the controls. They are the only user type that can alter or duplicate listings and add or remove users. (This is the level of user access that we will request, because we may need to alter listings or add further users).
Managers have almost the same powers as owners, except they lack the ability to create or delete users or remove listings. They can still optimise the listing and content and use all the other enabled features.
Site managers only have access to the content on your page. They can post edits, create posts, reply to reviews, and access insight information. This level of access is usually granted to assistants, interns, or customer service team members who are responsible for checking reviews and keeping the page content new and updated.
2. Log in to Google Business Profile
Assuming you already have a live GBP account(s), go to Google Business Profile and log in with your usual credentials.
3. Choose your location
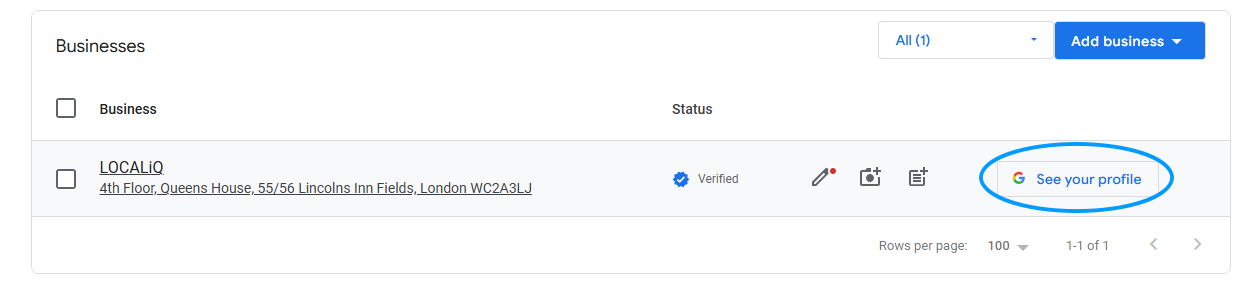
If you have more than one location then you will need to repeat these steps for each profile you wish to add a new user to. In Google Business Profile page manager, click “See your Profile”. This will then take you to the live Google Business Profile for that particular location.
4. Click the 3 dots to expand the menu, and then click Select ‘Business Profile Settings’

This will then open a pop up window with the following options:

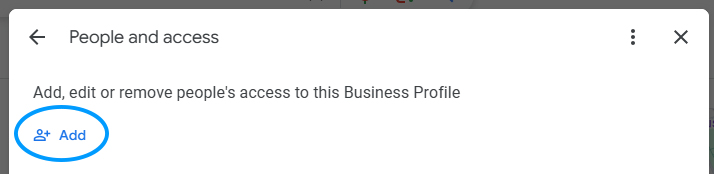
5. Click on ‘people and access’ then click add
This will prompt you to enter the email address of the new user.
6. Enter the email address
Make sure to enter the correct email address of the person or organisation that you are granting access to.
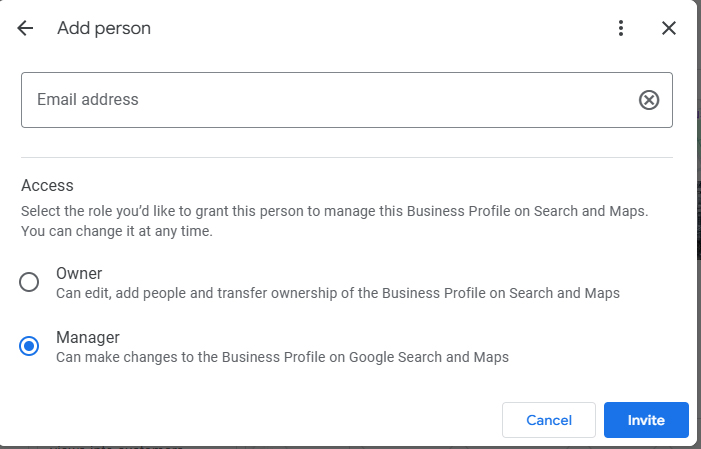
7. Select the role for your new user
You will see the option to choose between ‘owner’ and ‘manager’ In the same window that you enter the email address, choose the required role and then click ‘invite’.
8. Confirm that the intended user has access
Send an email to the new user to ensure that they have access to the Google Business Profile account and can perform all the functions of their user designation.
Reasons for allowing access vs. sharing private information
Why spend time granting access when you could share your login details instead?
It will allow external SEO partners and agencies to do their job more efficiently
At LOCALiQ, we work with many clients using the Google Business Profile tool.
Allowing us access instead of providing us with login details will ensure that we can remain logged in to a singular account and manage profiles from one place, rather than spending time logging in and out of multiple accounts. This will ensure that we can give our full attention on delivering results.
It protects your business
Your private login information belongs to you, and information like this should not be shared. Whilst you can grant us access so that we can help, by keeping your login information private, you can ensure that you have full control and access over your business account.
Interested in finding out more about how we work with businesses to improve their local SEO? Contact us today!
Related Articles

How to Optimise for AI-Powered Search: A 2026 Guide for UK Businesses
Prompt Research: The Next Step for AI Search and What UK Businesses Need to Do Now
Non-Commodity Content: What It Is and Why Your Business Needs It
How much does SEO cost in the UK? A 2026 pricing guide
Is Your Business Visible in ChatGPT, Gemini and Perplexity? Here's How to Check